Knowledge base article
Install and configure Ghost blog in cPanel using Apache Reverse Proxy with mod_proxy
Other cpanel articles
A beginners guide to email spoofing
Accessing your site before changing DNS
An introduction to email authentication
Basic WordPress security and site management
Can I test out your services for free?
Check MySQL database table disk usage
Configure object cache with memcached and Litespeed Cache plugin
Configure spam filtering in cPanel
Connect via SFTP using SSH key authentication with FileZilla
Connecting to Serversaurus shared hosting via SFTP
Create a clone of your website
Create a SSH key pair and configure your SSH key in cPanel
Create a WordPress administrator via MySQL CLI
Create a WordPress administrator via phpMyAdmin
Create a WordPress cron task in cPanel
Create and manage email accounts in cPanel
Create Autoresponders in cPanel
Disable automatic WordPress updates via wp-config.php
Domain options for shared hosting
Download or restore individual files, directories or database backups with JetBackup
Emptying Trash, Junk and Spam files
Enabling PHP extensions, Changing PHP Version and Setting PHP Options
Export or Import a MySQL database via CLI
Force HTTPS via .htaccess (cPanel)
Go live with your WordPress staging website
Help! I need a backup of my cPanel-hosted website
Hide .html extension using .htaccess
How did my WordPress website get hacked? What do I do?
How to ensure website generated emails are delivered successfully
How to issue a Let’s Encrypt certificate
How to remove Site Software management
I can receive email but can’t send!
Install or manage complimentary SSL certificates with AutoSSL
Introduction to LiteSpeed Cache
Login to cPanel via the Client Portal
Manage DNS zones with the cPanel Zone Editor
Manual WordPress migrations in a nutshell
Migrate remote staging website to local hosting server
Migrate remote transactional website to local server
Migrating email from one POP/IMAP email account to another
My site and/or email service is down
Network Firewall (I can’t access my services on a non-standard port)
Pointing your domain to Serversaurus
Pointing your domain to Squarespace with cPanel
Prevent website generated spam with CAPTCHA
Push updates from a staging to production website
Reconfigure production website to subdomain
Recover your hacked WordPress website
Remove Wordfence firewall block via MySQL CLI
Secure your WordPress installation
Setting up email on your iPhone
Subdomains for test sites & more
The SLA – Best effort versus 99.9% versus 100%
Unable to renew certificate: The Let’s Encrypt HTTP challenge failed
Understanding CloudLinux resource limits
Update a WordPress website to use a new domain name
Update your WordPress username via phpMyAdmin
What exactly is shared hosting?
Why don’t you have unlimited plans?
WordPress install still shows Serversaurus “new customer” landing page
Ghost is an open source, professional publishing platform built on a modern Node.js technology stack — designed for teams who need power, flexibility and performance.
Hitting the right balance of needs has led Ghost to be used in production by organisations including Apple, Sky News, DuckDuckGo, Mozilla, Kickstarter, Square, Cloudflare, Tinder, the Bitcoin Foundation and many more.
This guide will teach you how to install Ghost blog using cPanel hosting with Apache mod_proxy and Cloudlinux Node.js app.
Configure your Node.js app and install Ghost
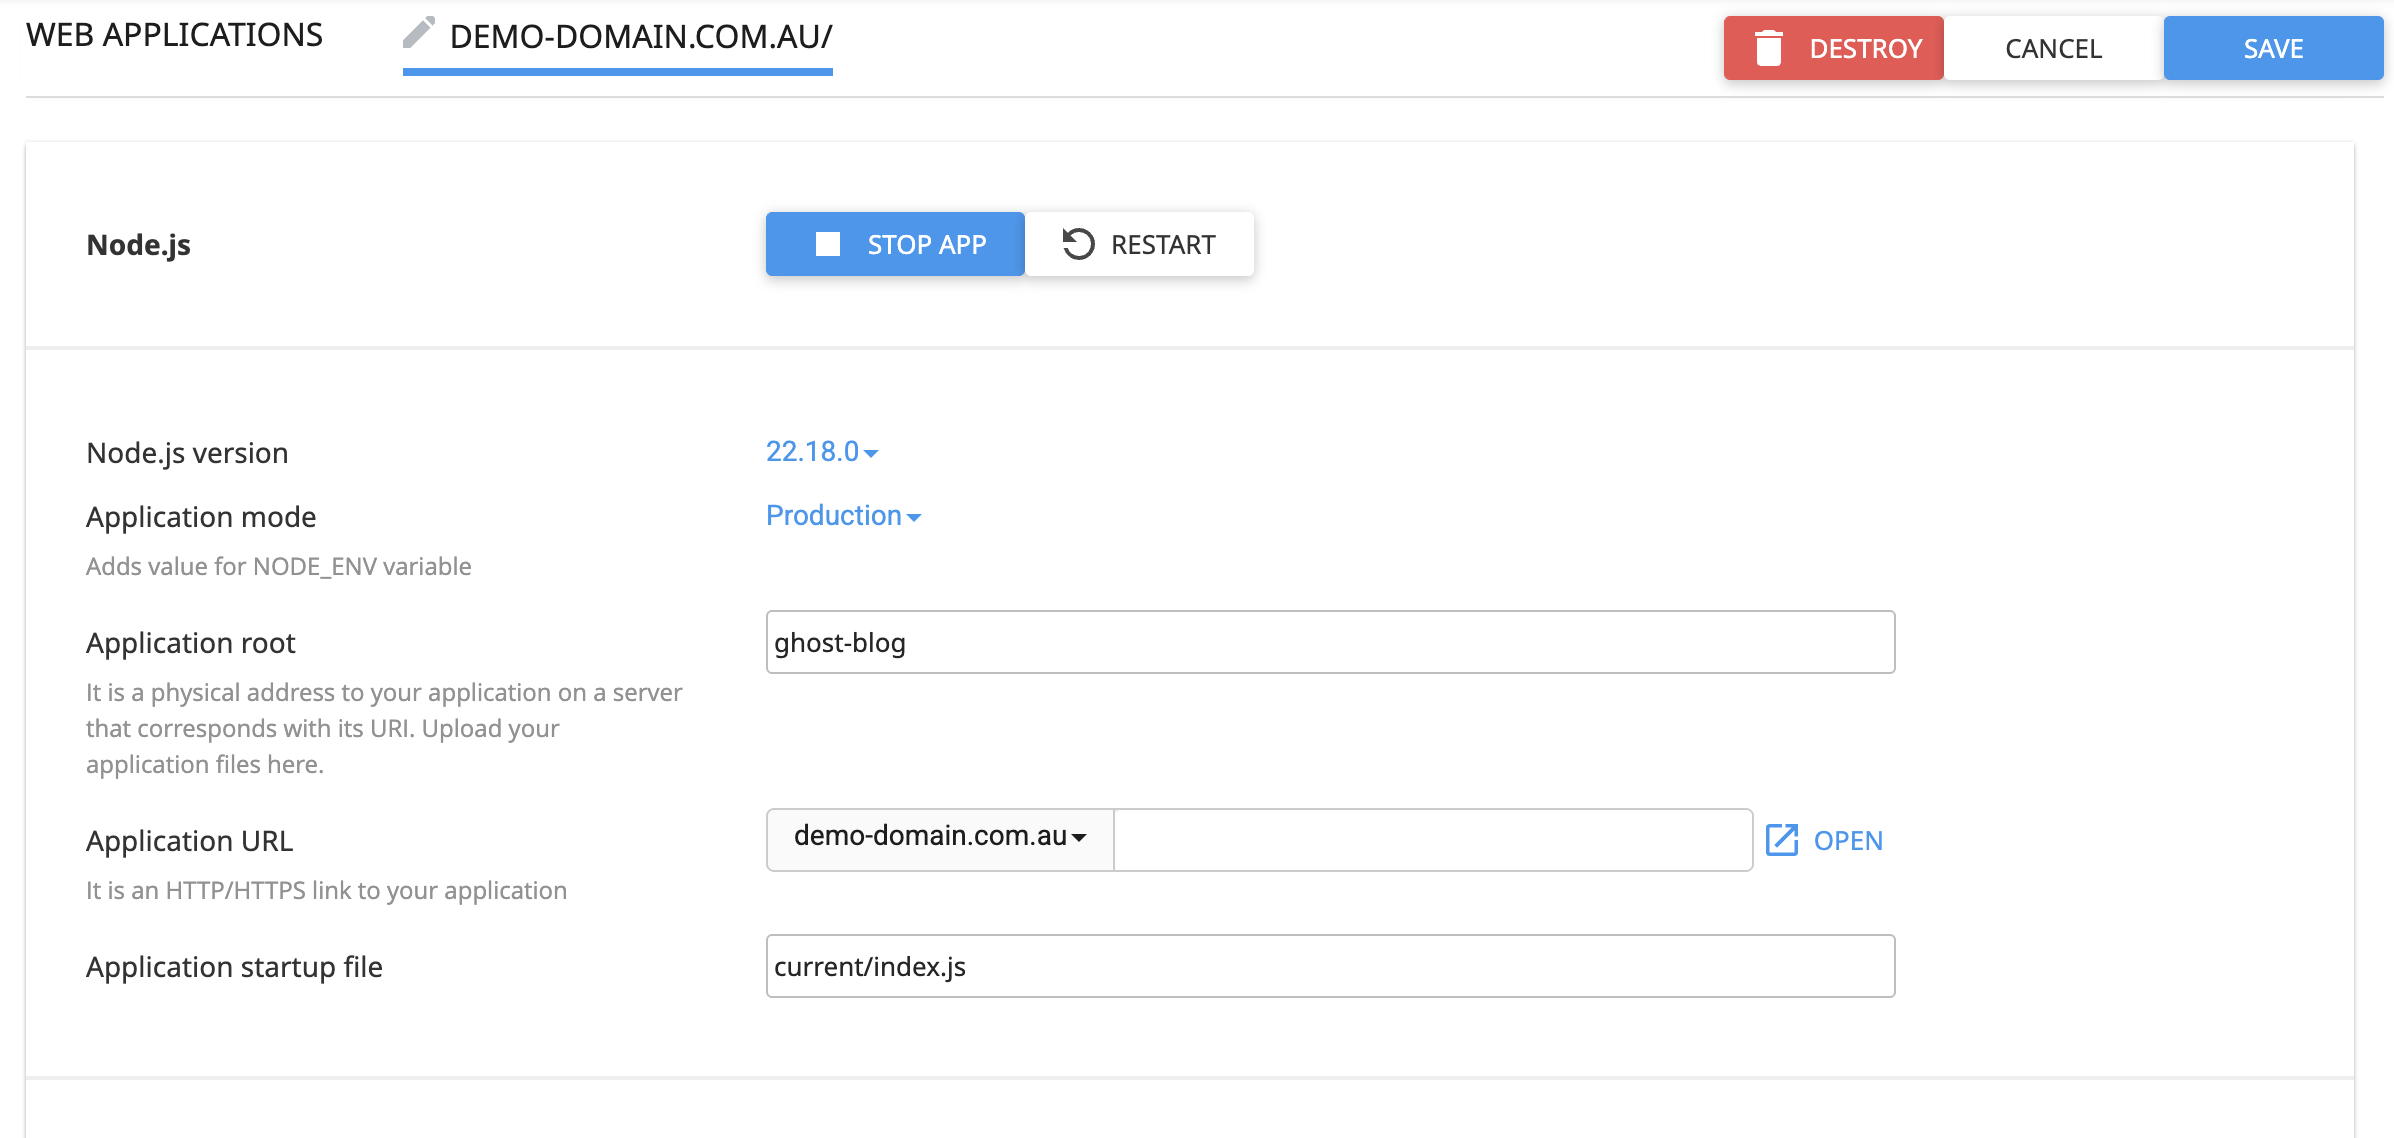
Log in to your cPanel account and navigate to Setup Node.js App.

Create a new application with:
- Node.js version 22.x (or compatible)
- Application root /$HOME/$CPANELUSER/ghost-blog
- Application startup file current/index.js
Select Save to create the Node.js environment.
Copy the source command displayed at the top of the Node.js app and log in to cPanel via Terminal using SSH or cPanel Terminal. Paste the source command to start using npm.
 From your home directory, change into your Node application root:
cd ~/ghost-blog/Install Ghost CLI:
npm install ghost-cli@latest -gChange into your application public folder and install Ghost:
cd ~/ghost-blog/public ghost install localThis takes a while, so get a coffee!
Create .htaccess in public_html
Since the cPanel document root is ~/public_html, the reverse proxy will be configured there. Edit or create ~/public_html/.htaccess in and add the following:
# Allow AutoSSL
RewriteEngine On
RewriteCond %{REQUEST_URI} ^/\.well-known/acme-challenge/ [NC]
RewriteRule ^ - [L]
Save and close the file.
Configure Apache Reverse Proxy with mod_proxy
This guide is designed for users and web hosts who wish to install Ghost blog. To perform these steps root access is required. If you wish to install Ghost within your cPanel account, please contact our friendly support team to arrange this configuration to be added on your behalf. Otherwise if you are a server admin, please proceed to configure mod_proxy. We've followed cPanel's instructions on configuring Apache Reverse Proxy for a virtual host. The steps are as follows:
Create the directories and files where the includes go:
mkdir -p /etc/apache2/conf.d/userdata/ssl/2_4/$CPANELUSER/$DOMAIN.TLD/
mkdir -p /etc/apache2/conf.d/userdata/std/2_4/$CPANELUSER/$DOMAIN.TLD/
touch /etc/apache2/conf.d/userdata/ssl/2_4/$CPANELUSER/$DOMAIN.TLD/include.conf
touch /etc/apache2/conf.d/userdata/std/2_4/$CPANELUSER/$DOMAIN.TLD/include.conf
Open both include.conf files in your preferred text editor, and add the following:
# Allow AutoSSL
RewriteCond %{REQUEST_URI} !^/.well-known/acme-challenge/ [NC]

# Proxy all other requests to Ghost
RewriteRule ^(.*)$ http://127.0.0.1:2368/$1 [P,L]

# WebSocket support for Ghost admin
RewriteCond %{HTTP:Upgrade} =websocket [NC]
RewriteRule /(.*) ws://127.0.0.1:2368/$1 [P,L]

ProxyPreserveHost On
ProxyPassReverse / http://127.0.0.1:2368/
Rebuild the httpd.conf file, run the following script:
/usr/local/cpanel/scripts/rebuildhttpdconf
Restart the Apache service:
/usr/local/cpanel/scripts/restartsrv_httpd
Configure Ghost
Return to your application root (~/ghost-blog/public ) and create the production config file. Copy config.developement.json to the new filename config.production.json:
Hopefully all is well and your website is now loading Ghost Blog. You can continue to create your admin user via https://your-domain.com.au/ghost.

Troubleshooting Notes
Site not loading via HTTPS
Confirm AutoSSL or Let’s Encrypt issued a valid certificate.
Ensure .well-known/acme-challenge/ is excluded from the proxy.
Check HTTP access logs for details regarding access to .well-known/acme-challenge.
Ensure the domain resolves to your cPanel server’s public IP.
Ghost admin panel not working
Confirm WebSocket proxy rules are present in include.conf files.
Verify ProxyPreserveHost On and ProxyPassReverse are set.
Ensure Node.js app is running on port 2368.
Use ghost ls command to confirm app details.
Ghost updates failing
Perform updates inside ~/ghost-blog using ghost update.
Ensure Node.js and dependencies meet Ghost requirements.
Node.js environment issues
Select the correct Node.js version in cPanel.
Use the source command before running npm or Ghost CLI commands.
Restart Node.js app if Ghost does not respond.
Ghost install process requires a lot of RAM and approximately 3GB disk. Ensure you have sufficient resources for the install.
Useful Ghost CLI Commands
Always run Ghost CLI commands from the Node.js application environment using the source command from cPanel Terminal.
| Command | Description |
|---|---|
ghost start | Start the Ghost application |
ghost stop | Stop the Ghost application |
ghost restart | Restart Ghost (useful after config changes) |
ghost status | View the current status of Ghost |
ghost update | Update Ghost to the latest version |
ghost log | View Ghost logs in real-time |
ghost doctor | Check the Ghost installation for common issues |
Last updated September 18, 2025
"*" indicates required fields