Knowledge base article
Getting Started with the Content Delivery Network (CDN)
View other Serversaurus cloud platform articles
Related articles
Can I test out your services for free?
Getting Started with Anycast DNS
Using the Serversaurus Cloud CDN with your WordPress website
Other Serversaurus cloud platform articles
Can I test out your services for free?
Getting Started with Anycast DNS
Getting Started with Virtual Machines
Network Firewall (I can’t access my services on a non-standard port)
The Serversaurus Self-Service IP Allow system
The SLA – Best effort versus 99.9% versus 100%
Using the Serversaurus Cloud CDN with your WordPress website
This article will guide you through creating Content Delivery Network (CDN) resources using the Serversaurus Cloud Platform
The Serversaurus Cloud platform exposes its users a global network of highly-performing but affordable CDN caching peers.
The Serversaurus Cloud content delivery network is a pull CDN - caching peers request a file from your website (a.k.a the origin, which is hosted anywhere, such as Virtual Machine or another web host), and stores it locally for a period of time.
Should the file be requested again by a user from that peer - it will be served from the cache at a higher speed and lower traffic cost than would otherwise be the case.
How do I use the CDN?
Where appropriate, substitute example.org for the actual URL of your website.
- Login to the Serversaurus Cloud Dashboard and proceed to the CDN Resources page:

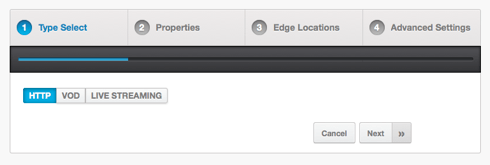
- Select CDN Resource Wizard

- Select HTTP as the CDN Type, and select Next

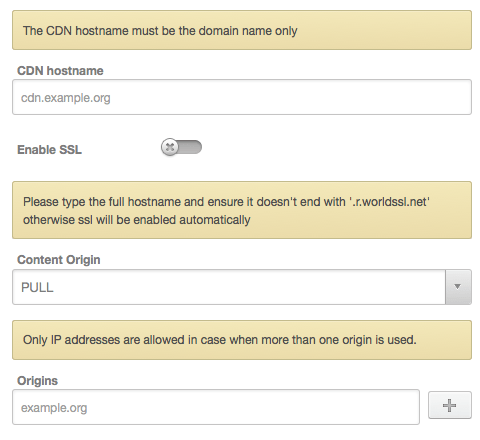
- Fill in the CDN Hostname and Origins
CDN Hostname - just enter a hostname that you would like your CDN to be accessible at. It doesn't need to be real - an alternate will be provided.
Origins - just type in the domain name that you usually access your website at.
Content Origin - just select PULL in this case.
Note on SSL: You may use HTTPS/SSL using either a shared (yourdomain.r.worldssl.net) hostname, or a custom hostname (such ascdn.yoursite.org) by using Let's Encrypt SSL.

- Select Next
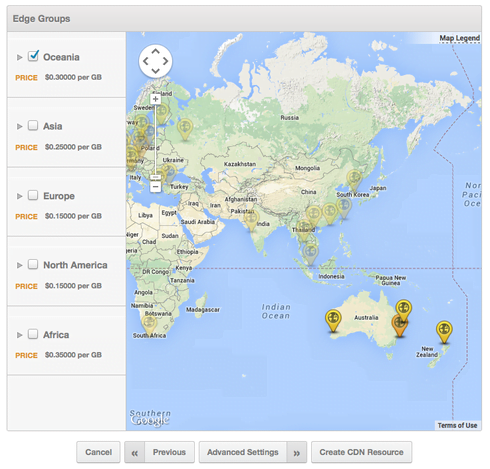
- In this final step, select which locations you would like your CDN to be enabled in.
There is nothing wrong with selecting all locations - a user will always be directed to the closest of your selected choices
- Select Create CDN Resource
- It can take a few minutes for the CDN to become active. While you wait, please note the Raw CDN hostname on the proceeding page

A CNAME record is only required when you are using the HTTP resource (as in above example) or Custom SNI SSL, in which case it will end in.r.worldssl.net
Configuring your application to use the CDN
This is specific to whichever application you are using. For WordPress users, follow our guide about using Serversaurus' Cloud CDN with your WordPress Website.
Last updated November 30, 2023