Knowledge base article
LiteSpeed Web Cache Manager
Related articles
Configure object cache with memcached and Litespeed Cache plugin
Introduction to LiteSpeed Cache
Other WordPress articles
Accessing your site before changing DNS
Basic WordPress security and site management
Check MySQL database table disk usage
Configure object cache with memcached and Litespeed Cache plugin
Create a clone of your website
Create a WordPress administrator via MySQL CLI
Create a WordPress administrator via phpMyAdmin
Create a WordPress cron task in cPanel
Disable automatic WordPress updates via wp-config.php
Domain options for shared hosting
Download or restore individual files, directories or database backups with JetBackup
Enabling PHP extensions, Changing PHP Version and Setting PHP Options
Export or Import a MySQL database via CLI
Force HTTPS via .htaccess (cPanel)
Go live with your WordPress staging website
Help! I need a backup of my cPanel-hosted website
How did my WordPress website get hacked? What do I do?
How to ensure website generated emails are delivered successfully
How to issue a Let’s Encrypt certificate
How to remove Site Software management
Introduction to LiteSpeed Cache
Manual WordPress migrations in a nutshell
Migrate remote staging website to local hosting server
Migrate remote transactional website to local server
My site and/or email service is down
Optimising Wordfence firewall and security settings
Prevent website generated spam with CAPTCHA
Push updates from a staging to production website
Reconfigure production website to subdomain
Recover your hacked WordPress website
Remove Wordfence firewall block via MySQL CLI
Secure your WordPress installation
The SLA – Best effort versus 99.9% versus 100%
Understanding CloudLinux resource limits
Update a WordPress website to use a new domain name
Update your WordPress username via phpMyAdmin
WordPress install still shows Serversaurus “new customer” landing page
This article will guide you through using the LiteSpeed Web Cache Manager in cPanel
LiteSpeed provides a Web Cache Manager function in cPanel to help manage caching for your hosted WordPress websites.
LiteSpeed Cache is enabled by adding rewrite directives to a websites .htaccess file. The LiteSpeed Web Cache Manager can automatically enable or disable caching by adding or removing the entries from .htaccess. The function will also automatically install LiteSpeed Cache for WordPress, so you can manage the cache settings from within WordPress admin.
If your website has caching configured by another plugin, LiteSpeed Web Cache Manager will detect this configuration and not enable caching for the site, so if you're changing from another cache plugin to LiteSpeed Cache, please disable and remove the existing cache plugin before proceeding to enable LiteSpeed Cache.
Start managing your LiteSpeed Cache installations:
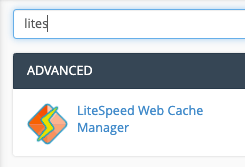
- Login to cPanel and navigate to the LiteSpeed Web Cache Manager, use the search bar to assist you

- At the bottom of the LiteSpeed Web Cache Manager homepage, and select WordPress Cache

- To discover WordPress installations hosted within your cPanel account, select Scan

- Once the scan completed, any discovered WordPress installations will listed so you can Enable or Disable cache, additionally you can set a Flag, to ensure a service is excluded from LiteSpeed Cache. Any WordPress installs with an existing caching plugin activated, will also be marked with a Flag.
To manage advanced LiteSpeed Cache configurations, use the LiteSpeed Cache dashboard in WordPress admin.
Published April 2, 2020. Last updated November 30, 2023.
Can't find what you're looking for?
"*" indicates required fields