Knowledge base article
LiteSpeed Web Cache Manager
This article will guide you through using the LiteSpeed Web Cache Manager in cPanel
LiteSpeed provides a Web Cache Manager function in cPanel to help manage caching for your hosted WordPress websites.
LiteSpeed Cache is enabled by adding rewrite directives to a websites .htaccess file. The LiteSpeed Web Cache Manager can automatically enable or disable caching by adding or removing the entries from .htaccess. The function will also automatically install LiteSpeed Cache for WordPress, so you can manage the cache settings from within WordPress admin.
If your website has caching configured by another plugin, LiteSpeed Web Cache Manager will detect this configuration and not enable caching for the site, so if you're changing from another cache plugin to LiteSpeed Cache, please disable and remove the existing cache plugin before proceeding to enable LiteSpeed Cache.
Start managing your LiteSpeed Cache installations:
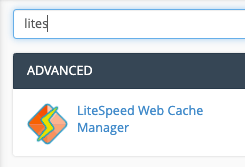
- Login to cPanel and navigate to the LiteSpeed Web Cache Manager, use the search bar to assist you

- At the bottom of the LiteSpeed Web Cache Manager homepage, and select WordPress Cache

- To discover WordPress installations hosted within your cPanel account, select Scan

- Once the scan completed, any discovered WordPress installations will listed so you can Enable or Disable cache, additionally you can set a Flag, to ensure a service is excluded from LiteSpeed Cache. Any WordPress installs with an existing caching plugin activated, will also be marked with a Flag.
To manage advanced LiteSpeed Cache configurations, use the LiteSpeed Cache dashboard in WordPress admin.
Published April 2, 2020. Last updated November 30, 2023.
Can't find what you're looking for?
"*" indicates required fields