Knowledge base article
Push updates from a staging to production website
This guide will teach you how to synchronise all changes in staging with production
This guide is for WordPress websites however the steps can be easily adjusted for most content management systems.
To complete this guide, please ensure you have:
- Your cPanel login credentials
If you have forgotten your cPanel credentials, they were included in the original Welcome to Serversaurus or IMPORTANT: Hosting Documentation email which you should find in your inbox, otherwise follow our instructions on updating your cPanel password.
- A WordPress administrator login
To login to WordPress please ensure you have a WordPress administrator username and password.
Let's get started!
- Using the WP Migrate Lite plugin, we will perform a find & replace and export the staging website database. For the find and replace, we will update the database to use the production domain and directory path.Login to WordPress dashboard and navigate to Plugins >> Add New >> Install WP Migrate Lite >> Activate Plugin. Then continue to Tools >> WP Migrate >> Migrate >> Export. Update the Replace fields with the production domain and new directory path, for example:

Select Export. The database export will be automatically downloaded to your computer.Tip: If there are website functions collecting data on the production website, for example a contact form which is storing submission information in the database, you can exclude the contact form database tables from the export to ensure the submission data on production remains untouched when the database is imported. You can exclude database tables within the Migrate >> Export settings, under Database >> Tables.
- To import the database, login to cPanel and open phpMyAdmin.Select the production database from the left hand side and navigate to the Import tab, select Choose file to upload the database export, then select Import at the bottom of the page.Tip: If you're unsure which is the production database, you can confirm these details within the wp-config.php file within the document root for the production website.
- Next we will synchronise any file changes, to begin open the Terminal function in cPanel.We will use the rsync command to synchronise new or changed files from the source (staging) to the destination (production) directory.Our command excludes any site specific configuration files.Please update the below command, where staging.yourdomain.com/ is the staging website document root (this is usually labelled as your staging domain), and public_html/ is the document root for your production website, you can confirm your domain document root from the Domains cPanel function if required.
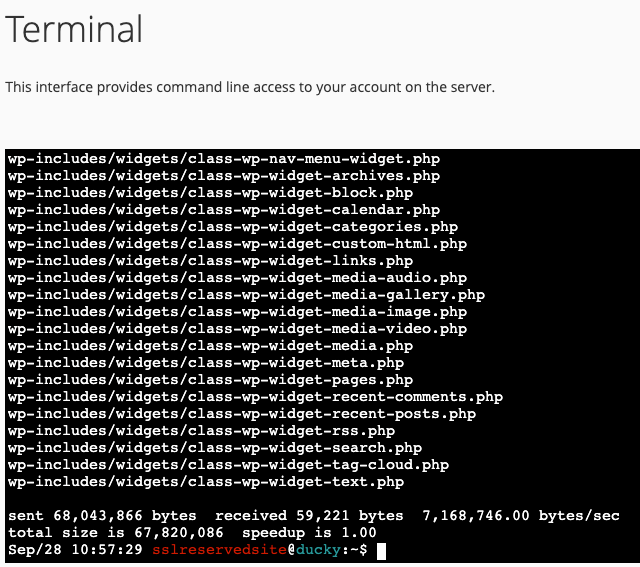
rsync -av --exclude 'wp-config.php' --exclude '.htaccess' --exclude 'wordfence-waf.php' --exclude '.user.ini' --exclude 'error_log' staging.domain.com/ public_html/When ready, copy/paste the command into the Terminal window and select Enter on your keyboard to initiate the command. While the rsync task is in progress, the command output will show the file transfer progress, when the tasks completes, the Terminal window will look similar to below:

Well done! All staging updates have been pushed to production. If caching is enabled, you'll need to clear all cache to see the latest version. If there's any issues, use the troubleshooting recommendations below to assist you.
Troubleshooting recommendations:
If you have any warnings/errors, please check for the following common issues.
- Login to WordPress and clear all website cache.
- Check DNS is resolving to correct server IP address.
- Login to phpMyAdmin, check wp_options table and confirm the siteurl and home are pointing to the correct domain name - update if required.
- Check all PHP dependencies are enabled.
- If all fails, use the JetBackup function in cPanel to restore an earlier version of the website.
Last updated November 30, 2023