Knowledge base article
Install WordPress via SSH
View other technical support articles
Related articles
Basic WordPress security and site management
Create a WordPress administrator via MySQL CLI
Create a WordPress administrator via phpMyAdmin
Other technical support articles
A beginners guide to email spoofing
Accessing your site before changing DNS
An introduction to email authentication
Basic WordPress security and site management
Check MySQL database table disk usage
Configure object cache with memcached and Litespeed Cache plugin
Configure spam filtering in cPanel
Connect via SFTP using SSH key authentication with FileZilla
Connecting to Serversaurus shared hosting via SFTP
Create a clone of your website
Create a SSH key pair and configure your SSH key in cPanel
Create a WordPress administrator via MySQL CLI
Create a WordPress administrator via phpMyAdmin
Create a WordPress cron task in cPanel
Disable automatic WordPress updates via wp-config.php
Download or restore individual files, directories or database backups with JetBackup
Enabling PHP extensions, Changing PHP Version and Setting PHP Options
Export or Import a MySQL database via CLI
Force HTTPS via .htaccess (cPanel)
Getting started with our DNS Manager
Getting Started with Virtual Machines
Go live with your WordPress staging website
Help! I need a backup of my cPanel-hosted website
Hide .html extension using .htaccess
How did my WordPress website get hacked? What do I do?
How to ensure website generated emails are delivered successfully
How to issue a Let’s Encrypt certificate
How to remove Site Software management
I can receive email but can’t send!
Install and configure Ghost blog in cPanel using Apache Reverse Proxy with mod_proxy
Introduction to LiteSpeed Cache
Manage DNS zones with the cPanel Zone Editor
Manual WordPress migrations in a nutshell
Migrate remote staging website to local hosting server
Migrate remote transactional website to local server
Migrating email from one POP/IMAP email account to another
My site and/or email service is down
Network Firewall (I can’t access my services on a non-standard port)
Optimising Wordfence firewall and security settings
Pointing your domain to Serversaurus
Pointing your domain to Squarespace with cPanel
Prevent website generated spam with CAPTCHA
Push updates from a staging to production website
Reconfigure production website to subdomain
Recover your hacked WordPress website
Remove Wordfence firewall block via MySQL CLI
Secure your WordPress installation
Setting up email on your iPhone
Subdomains for test sites & more
Unable to renew certificate: The Let’s Encrypt HTTP challenge failed
Understanding CloudLinux resource limits
Update a WordPress website to use a new domain name
Update your WordPress username via phpMyAdmin
Using Serversaurus’ nameservers but hosting your email elsewhere
This article will walk you through installing WordPress manually using the command line and shared cPanel hosting
Please note that this article is advising the steps for Mac/Linux users. If you do not have Terminal or alternative command line interface on your computer, please use the Terminal function in cPanel, in which case you can skip to step number 2.
- Open Terminal and ssh onto your hosting server. If you are unaware of your FTP details, please reference the original Welcome to Serversaurus email which includes all relevant FTP details (note, your FTP details are the same as your cPanel credentials) or alternatively find out how to update your FTP/cPanel credentials.
- In Terminal replace the username and server info with your own
ssh user@yourserver.serversaurus.com.au
Press Enter and type your password when prompted.
- Change into the directory you would like to install WordPress under, if the WordPress installation is for your primary website this would be public_html. To change into your public_html directory type and enter:
cd public_html
Or if you are installing WordPress on a addon domain, navigate to the addon domain's home directory using the below command:
cd yourdomainname.com - Using the wget command, we will download WordPress into our current directory.
wget http://wordpress.org/latest.tar.gz - Now to extract the contents of the latest.tar.gz file type the command:
tar xfz latest.tar.gz - Use the command ls -l to view the content under your current directory, you will be able to see that there is now a directory called wordpress under your current directory. Lets move that directories contents into our current directory, to do this issue the below command:
mv wordpress/* ./ - Now lets tidy up after ourselves, we no longer need the 'WordPress' directory or the latest.tar.gz file, to remove these items, issue the following command:
rm -rf latest.tar.gz ./wordpress/ - Next, we need to create a database and a user that we can then associate with one another. To do so login to cPanel, then use the search function to navigate to MySQL Databases. NOTE: Remember to keep your MySQL database and user information recorded for later reference.
- Create the new database; Nominate your preferred name and select Create Database
- Scroll down until you see Add New User, fill out the form with your preferred username, then assign a password to that user. Make sure to copy that password and save it on your computers notepad or text editor.
- Once you have created the new user, scroll down the page until you see Add User To Database
- Select your newly created user and then select the new database, to save these settings select the Add button below.
- On the next page you will see Manage User Privileges, select the checkbox next to ALL PRIVILEGES then select Make Changes at the bottom of the page.
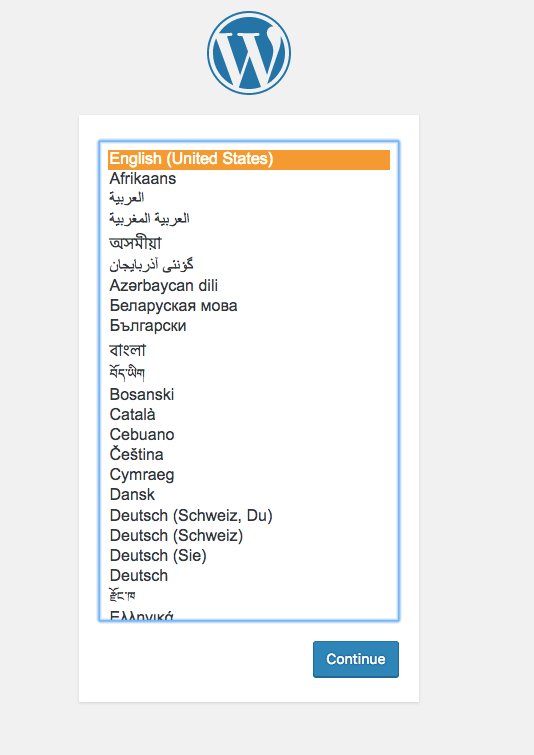
- Now you can go to your domain name, and see a WordPress configuration window (see screenshot below). Follow the configuration prompts with your desired settings.

- Complete the configuration steps to finalise your WordPress install! You can now login to WordPress dashboard via https://yourdomain.com/wp-admin with your nominated login credentials.
Published March 12, 2020. Last updated November 30, 2023.
Can't find what you're looking for?
"*" indicates required fields